
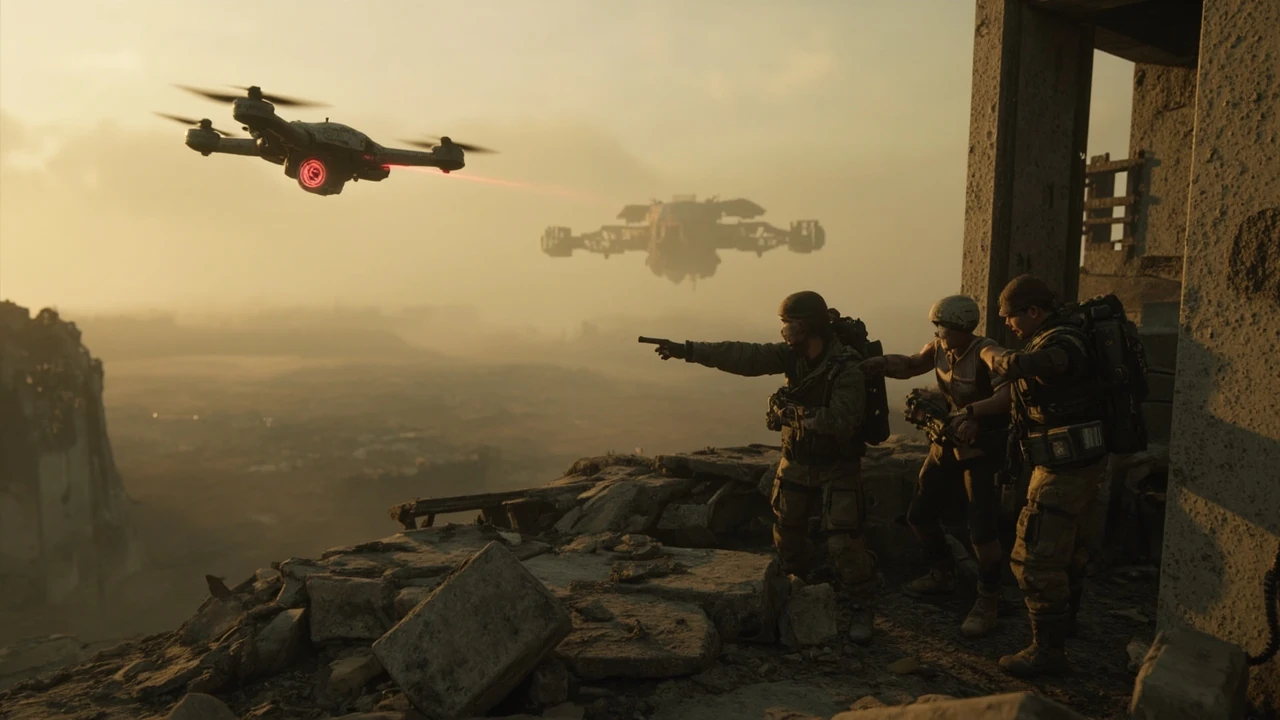
Arc raiders eyes in the sky: what the airborne surveillance threat actually is
Every extraction shooter lives or dies by its information layer, and Arc Raiders leans hard into that idea. Among the machine archetypes that patrol the surface, the airborne surveillance unit that players have come to call the “eyes in the sky” is the one that quietly decides whether a raid ends in a full backpack or an empty one. It does not have the largest health pool, it does not announce itself with a long warning roar, and it does not chase you across the map. What it does is watch, mark, and call in trouble, and that is exactly why it is so disruptive when you do not understand it.
This guide is written for Arc Raiders players who have run into the hovering sensor sphere, lost loot because of an unexpected patrol, or want to plan their next match around the way the surveillance layer works. We will look at what the unit appears to be in pre-release coverage and community observation, how its detection behavior shapes the moment to moment flow of a raid, and what practical options players have when it spots them. The goal is to give you a working mental model of the threat so that “eyes in the sky” stops being a mystery and becomes a variable you can plan around, the same way you plan around loot density, exit timers, and squad composition.
Because Arc Raiders is still being tuned before release, the details below lean on what has been publicly demonstrated and described rather than on speculation. Where the community is still working out a behavior, the article says so. Where the developers have been clear about intent in previews, that intent is treated as the editorial baseline.
Why the “eyes in the sky” matters in Arc Raiders
Arc Raiders is built around raids on a hostile surface that is not empty. ARC machines occupy the map, other players are competing for the same salvage, and every minute you spend above ground is a minute something is likely to notice you. The “eyes in the sky” is the design element that ties those three pressures together. It is the unit that turns a quiet looting route into a chain reaction of patrols, calls, and squad wipes.
Understanding this unit matters for three concrete reasons. First, it is one of the few ARC machines that influences fights you are not directly having. Its detection feeds into the broader machine response, which means other ARC units on the map will pivot toward your position even if you never see the flying sphere itself. Second, it is the most common reason players report “the whole map showed up” after a single mistake. The escalation pattern from a single airborne observer into a multi-unit response is something you can read and interrupt if you know the signs. Third, it shapes loadout choices. A build that is excellent at fighting ground units may be poorly suited to handling a fast-moving aerial sensor, and the difference is often decided before the match even starts.
For solo players, the unit is a constant soft timer on visibility. For squads, it is a coordination problem, because what one teammate does under observation affects the whole team. For players chasing high-value loot, it is a routing problem, because the shortest path to a container often crosses the most observed ground.
How Arc Raiders frames its airborne surveillance
Pre-release previews of Arc Raiders consistently describe the game as a “cooperative third-person extraction shooter” set on a surface dominated by ARC machines. Game Informer’s hands-on preview from May 2025, titled “Arc Raiders Impressions: The Most Promising Extraction Shooter I’ve Played,” spends significant time on how the ARC threat layer is designed, including how the developer Embryo Studios (published by Nexon) layers different machine roles so that the map itself pushes back against the player. That framing matters because the airborne surveillance unit is not a stand-alone enemy, it is a node in a designed response system.
You can see this in the way the previews describe the world. ARC machines are not random monster spawns, they are described as occupying a layered ecosystem where some units hold ground, some patrol, and some observe. The result is that the “eyes in the sky” feels less like a flying enemy and more like a sensor that happens to be a machine. Its design purpose is to make the rest of the ecosystem feel reactive, which is why taking it out rarely feels like the real objective even though it is the obvious one.
The broader context of the franchise, including the original single-player concept that preceded the extraction pivot, is documented on the ARC Raiders Wikipedia page. That history is useful because the current game’s surveillance feel grew out of a longer design process, not a single late addition. For the practical mechanics below, the previews and community observation are the primary evidence base, with explicit notes where behavior is still being confirmed.
Identifying the unit on the surface
Players tend to recognize the airborne observer by silhouette and behavior rather than by reading a label. The unit is a small, roughly spherical drone with short fixed wings, a single bright optical sensor, and very little exposed mass. It is significantly smaller than the combat drones and larger ARC constructs that also appear in the air or on ridgelines, and that smaller profile is intentional: it makes the unit harder to spot at range, especially when you are focused on ground loot and the elevation difference is just a small dark shape against a bright sky.
Behaviorally, the unit is more predictable than ground patrols. It does not sweep, it does not dive, and it does not run away when shot at. Instead, it hovers, holds position, and slowly rotates in place. The rotation is the visual cue players use most often, because a stationary sphere at altitude is easy to miss, but a slow turning silhouette against the horizon is much easier to track. The glowing sensor is the second cue. Unlike ambient lighting on rocks or other machines, the sensor has a consistent red or amber color that stands out in most biomes, particularly during dust and dusk conditions where the game tends to set its most tense encounters.
Audio is the third cue, and the most useful. The observer produces a steady, low mechanical hum that is distinct from the heavier footsteps of ground units, the firing sounds of combat drones, and the ambient wind and dust of the surface. Players who have learned the audio profile say they can hear it before they see it, especially when they stop moving to listen, which is itself a useful gameplay habit in a game where stopping can be a death sentence.
Detection, marking, and the call-in behavior
The core gameplay loop around the observer is straightforward on paper and punishing in practice. The unit scans a roughly conical area beneath it. Anything inside that area for long enough, or anything that creates a strong detection signal inside that area, gets registered as a contact. Once a contact is registered, the unit does not start shooting. It does not dive. It sends a signal. That signal is the moment the rest of the ARC ecosystem starts moving toward you.
This is the single most important thing to internalize about the unit. The observer’s value to the ARC faction is not its own damage, it is the fact that it converts a single detection event into a coordinated response. Once the signal is sent, ground units in the area pivot toward the marked zone, additional drones may reposition, and any extraction attempt you had planned in that part of the map becomes significantly more dangerous. Players often describe the result as “the whole map showed up,” and that is not an exaggeration of intent, it is an accurate description of the design goal.
Two practical corollaries follow. First, breaking line of sight to the unit does not necessarily break the response. The signal is sent on detection, and the response uses the last known mark. If you dive behind a wall the moment the sensor locks on, the response is still coming, you have just hidden from the consequences. Second, the response is time-limited, not permanent. After a window, ground units will re-patrol and the marked zone will cool down. That window is long enough to ruin a casual loot run, but short enough that patient players can wait it out instead of fighting.
Reading the alert states in a live match
Players who have spent time in the technical tests describe a layered alert state that is worth learning the way you would learn a mini-map in a tactical shooter. The state is not always shown as a clean UI element, because Arc Raiders tends to communicate threat through environmental cues, audio, and unit behavior rather than explicit on-screen warnings. That is part of the game’s design philosophy of making the world feel like the antagonist.
The base state is observation. The unit is hovering, rotating, and passively scanning. In this state, the unit is not actively marking you. Most players can move through observation range if they stay low, move slowly, and avoid long exposure. The transition to detection happens when a contact is registered. At that point, the sensor brightens, the hum may change pitch, and the unit holds its rotation on the contact rather than continuing its passive sweep.
From detection, the path leads to marking. The unit fires a visible signal into the sky, and the ground response begins. After the mark, the system either escalates or cools down based on whether the contact persists, whether new contacts are made, and whether the player is engaging ARC units. Reading these states in real time is the difference between a player who feels like the game is unfair and a player who feels like they are outplaying a system. Both players are actually playing the same game, but only one of them is reading the state correctly.
Solo play versus squad play around the observer
The observer is one of the few ARC units that affects the two main Arc Raiders player types in visibly different ways. Solo players are most exposed because they cannot split attention, they cannot cover multiple angles, and they cannot absorb a coordinated response the way a three-person squad can. For solos, the practical advice is to treat the observer as a hard routing constraint. If your planned route crosses a known observation position, you have two real options: detour around it, or commit to a plan that assumes the response is coming and prepares for it.
Detouring is the safer option and the one most solo players end up taking. It is also the option that costs the most time, and time is the scarce resource in an extraction match. The trade is usually worth it when the loot you are chasing is replaceable and the rest of the squad population is high. It is not always worth it when you are chasing a high-tier container near the end of a match, because the detour may cost more than the loot.
For squads, the observer is a coordination test. A well-coordinated squad can use the unit as a tool. One player draws detection on purpose, drawing the response away from a teammate who is grabbing a high-value container. The decoy then breaks line of sight and the squad extracts with loot that would otherwise be impossible. The risk is that the decoy does not break line of sight cleanly, the response converges on the same loot the team was chasing, and the entire squad gets caught in a crossfire between ARC ground units and other players drawn by the noise. Squad play around the observer is therefore a planning exercise as much as a shooting exercise.
What works against the observer in practice
There is no single trick that consistently beats the unit, because the game is being tuned and loadouts are part of the equation. That said, pre-release coverage and community reports describe a small set of approaches that come up again and again, and they are worth understanding even if the exact numbers shift between patches.
Line of sight breaks
The most reliable counter is also the most boring. If you can put a solid object between you and the observer before the detection state locks in, the sensor cannot complete its mark cycle. Walls, collapsed roofs, rock formations, and container stacks all count. The key is to know the rough detection range of the unit, which is shorter than its visual presence suggests, and to commit to the break the moment you hear the hum change. Hesitation is what turns a clean break into a partial mark.
Vertical and elevation changes
The observer’s scan cone is not perfectly vertical. Inside buildings, in trenches, and in low depressions, the geometry of the world itself provides cover. Players who learn the high-observation zones and the corresponding low-cover routes through the same areas gain a real advantage, because they can move past the unit without ever entering the cone. This is one of those map knowledge skills that looks invisible from the outside and feels obvious once you have it.
Active engagement
Shooting the unit is the obvious option and the one players reach for first. It works, but with two important caveats. First, the fight is loud, which means other players hear it and may decide to third-party the engagement. Second, the unit is often positioned over places where a firefight is the worst possible thing to do, because you are likely to be detected by other ARC units while you are focused on the observer. When players do engage, they tend to do it from cover, with a weapon that can hit a small target at altitude, and with an exit plan for the moment the response arrives.
Disruption tools
Some loadouts include utility items that can interrupt the observer’s detection cycle. The exact tools available vary, and balance changes are common in this phase of the game’s life, so the practical advice is to read the current tool description and test it in low-stakes raids before relying on it. The principle is what matters: if a tool can break the unit’s lock, it converts the observer from a hard counter into a soft timer, which is a much better place to be.
Choosing not to fight
The underused option is walking away. The response window is finite, and if you have not registered as a high-priority target, the system will cool down within a known time. Players who learn that window can simply leave the area, do something else for a few minutes, and come back when the patrol pattern has reset. It is unglamorous, and it costs time, but it is consistently the lowest-risk option in the toolkit.
Where the observer typically appears
Pre-release builds and the technical tests that have been covered publicly tend to place the unit in places where its design purpose is maximized. The pattern that emerges is not random, and recognizing it is one of the more useful skills a player can build.
| Zone type | Typical observer placement | Why it works for ARC | Player counter |
|---|---|---|---|
| High-value container clusters | Above the cluster, often on a single anchor point | Forces a trade between loot and exposure | Use interior cover, time the approach, split the squad |
| Extraction-adjacent routes | Over the final approach, not over the extract itself | Catches players moving in with full bags | Approach from a different vector, use smoke or cover |
| Chokepoints between biomes | Centered over the natural narrowing | Concentrates response into a small area | Take a longer route through less trafficked ground |
| Open plateau ruins | Over the center of the ruin, near the tallest standing wall | Rewards interior play, punishes open traversal | Hug walls, move between cover objects |
| Drop-in zones near surface access | Over the typical landing pattern, not the exact spot | Catches players before they are oriented | Drop on a low-cover side, orient before moving |
The common thread is that the observer is rarely placed over useless ground. If you see a stationary sphere overhead, assume the area beneath it was chosen for a reason, and plan your route accordingly. That single habit will save more raids than any weapon choice.
Reading the rest of the ecosystem
The observer is a node, not the whole network. Understanding how it relates to the other ARC units in a match is what turns individual tips into a working strategy. The table below summarizes the most common ARC roles described in previews and player reports, and how each one interacts with the observer’s detection signal.
| ARC role | Behavior without observer mark | Behavior after observer mark | Implication for the player |
|---|---|---|---|
| Ground patrol unit | Fixed patrol route, predictable timing | Pivots toward marked zone, increases patrol density | Plan around the original route, expect convergence |
| Heavy construct | Holds a position, rarely moves | Holds longer when supported by observer coverage | Fight the observer first if a heavy is in the way |
| Combat drone | Engages on direct contact, limited range | Repositions to support ground response | Watch the sky after a mark, not just the ground |
| Burrowing unit | Underground, reacts to nearby movement | Surfaces more aggressively near marks | Listen for subterranean audio cues after a mark |
| Swarmer | Area denial, low individual threat | Concentrates around marked zones | Treat marks as swarm attractors in tight spaces |
| Other players | Independent, opportunistic | Drawn toward the noise of the response | Expect third parties during any ARC engagement |
The implication is that the observer’s mark is not just a signal to one unit type, it is a multiplier on every other threat in the area. That is why even experienced players take marks seriously, and why new players often feel that the game is unfair when in fact they are reading only one layer of a layered system.
Pre-match planning that accounts for the observer
Because the observer shapes routes so heavily, the right time to plan around it is before the match starts. The list below captures the planning steps that players who consistently extract well tend to use. None of them are exotic, all of them are the kind of habit that becomes automatic with practice.
- Open the map and identify the two or three high-value container clusters that match your target loadout.
- For each cluster, mark the likely observer anchor based on prior raids and current patch behavior.
- For each anchor, identify a low-cover approach that avoids the scan cone, even if it adds thirty seconds of travel.
- Decide in advance which clusters are worth a direct engagement with the observer and which are detour-only.
- For solo runs, plan a fallback extraction route that does not cross any known observer anchor.
- For squad runs, assign a designated decoy player and a designated looter before you drop in.
- Check the current patch notes for any changes to observer detection range, response time, or weak points before committing to a plan.
None of these steps guarantee a clean raid. They do guarantee that when the observer does notice you, it is a known variable instead of a surprise, and that is the difference between a frustrating death and an interesting problem to solve.
Common mistakes when handling the observer
Some of the same mistakes come up in community discussions again and again. They are worth listing because they are the kind of errors that feel correct in the moment and only become obvious in retrospect.
- Treating the unit as a combat priority when the real priority is breaking line of sight and repositioning.
- Firing a loud weapon at the observer while standing in the open, which turns one detection into a three-way engagement.
- Assuming that breaking line of sight also breaks the response, which leads to walking back into the same marked zone a minute later.
- Sending the entire squad through the same approach, which guarantees the whole team gets marked together.
- Ignoring audio cues because the visual is more exciting, which is how a player ends up “suddenly” detected from behind.
- Fighting the observer near a heavy construct, which produces a two-front engagement that most loadouts cannot sustain.
- Returning to a looted container to grab a missed item, which is when the response finally catches up with the player.
The pattern is that every mistake on this list is the result of treating the observer as a standalone enemy instead of as part of a system. Once you start reading it as a system, the right move in each scenario becomes much more obvious.
How the observer is likely to evolve
Arc Raiders is in a phase where balance changes are frequent, and the observer is exactly the kind of unit that designers tend to tune repeatedly. Detection range, response time, sensor brightness, audio profile, and weak points are all candidates for adjustment. Without inventing any specific patch detail, it is safe to say that the unit’s role in the ecosystem is unlikely to change, even if the numbers do. The ARC faction needs an observation layer to make the rest of the layer feel intelligent, and the observer is the cleanest implementation of that role.
What may change is the player’s counterplay. New utility items, new loadout options, and new map geometry all have a direct effect on how the observer feels in any given patch. Players who treat their knowledge of the unit as a moving target, rather than a fixed fact, will adapt more easily than players who memorize a single trick and rely on it indefinitely. That is a useful frame for the entire game, but it is especially true for the observer because it sits at the intersection of so many other systems.
Putting it all together: a simple in-match workflow
For players who want a single repeatable approach, the workflow below is the one that holds up across the most pre-release coverage and community reports. It is not the only way to play, and it is not a guarantee of success, but it is a clean baseline that you can build on as the game evolves.
- Drop in oriented. Land on the low-cover side of your intended route and identify landmarks before moving.
- Listen. Spend the first ten seconds of a raid listening for observer hums rather than sprinting to loot.
- Route around. If you hear the hum, pick a low-cover path that does not cross the scan cone.
- Approach clusters from cover. Use interior geometry and elevation drops to stay below the cone until you are inside the cluster.
- Mark, then move. If you are detected, break line of sight, move to a secondary position, and wait for the response to pass.
- Loot under time pressure. Treat every mark as a soft timer, and do not stay in a marked area longer than you have to.
- Extract on a different vector. Do not extract from the side of the map that the response converged on.
That workflow is intentionally simple. The complexity of the observer comes from the system around it, not from the unit itself, and a simple workflow tends to survive contact with a complex system better than a clever one does.
When the observer is not your real problem
One last framing is worth keeping in mind. The observer is often blamed for failures that are actually caused by other systems. If you are getting wiped every match, it is worth asking whether the observer is the root cause or just the most visible symptom. A few possibilities to consider, each of which has a different solution:
- If you are being detected constantly, the issue may be your movement profile rather than the observer’s range. Slow, crouched, and cover-based movement reduces the detection signal in general.
- If the response feels overwhelming, the issue may be that you are fighting the response instead of breaking contact. The response is designed to be overwhelming on purpose, and the correct move is usually to disengage.
- If you are getting third-partied during ARC engagements, the issue may be that you are engaging in popular areas. The observer is a constant, the player population is variable, and high-traffic areas amplify both.
- If the observer seems to mark you from impossible angles, the issue may be a line of sight you have not considered, including reflections off metal surfaces and detection through thin cover.
Each of those is a separate problem with a separate solution, and none of them are solved by learning more about the observer alone. They are mentioned here because the most common reason players get frustrated with the unit is that they assume the unit is the problem when the system around it is the problem.
Frequently asked questions
What is the “eyes in the sky” in Arc Raiders?
It is the common player name for the small, spherical ARC machine that hovers above the surface and acts as the airborne observation layer of the ARC ecosystem. Its job is to detect players, mark their position, and trigger a coordinated response from other ARC units in the area. It is not the toughest enemy in the game, but it is one of the most influential because it converts a single detection into a multi-unit response.
Does the eyes in the sky attack players directly?
Based on pre-release coverage and community reports, the unit’s primary role is observation and signaling rather than direct combat. It does not dive, chase, or use heavy weapons against players. Its danger comes from the ground and air response it triggers, not from its own damage output. That distinction is important because it changes how you prioritize it in a fight.
How do I know if the eyes in the sky has detected me?
Detection is communicated through a combination of audio and visual cues. The unit’s hum may change pitch, the sensor may brighten, and the unit will hold its rotation on your position rather than continuing its passive sweep. A visible signal fired into the sky indicates that the mark has been sent and the response is on its way. There is no single on-screen warning, which is part of the game’s design philosophy of communicating threat through the world rather than the UI.
Can I shoot down the eyes in the sky?
Yes, the unit can be destroyed. It is a small target at altitude, so weapons with reasonable accuracy and range work best. The trade is that fighting it is loud, draws the attention of other players, and may place you in a position where the ground response arrives while you are still focused on the air. For most players, the cleaner option is to break line of sight and reposition, then decide whether to engage on more favorable terms.
Does breaking line of sight stop the response?
Not immediately. The mark is sent on detection, and the response uses the last known position. If you break line of sight at the moment of detection, you may prevent the mark from being sent, but if the mark has already gone out, the response will still converge on the last known zone. The response is time-limited, so the practical move is to leave the marked area, wait for it to cool down, and then return if the loot is worth it.
Is the eyes in the sky worse for solo players or squads?
It affects both, but in different ways. Solo players are more exposed because they cannot split attention or absorb the response, so for solos the unit tends to be a routing constraint that forces detours. Squads can use the unit as a tool by deliberately drawing detection away from a teammate, but they also have to coordinate carefully because a single bad read can mark the whole team at once. Neither playstyle is strictly better, but the planning is different.
Where does the eyes in the sky usually appear?
It tends to appear over high-value container clusters, near extraction approaches, over chokepoints between biomes, and over open plateau ruins. The placement is rarely random. If you see the unit overhead, assume the ground beneath it was chosen for a reason and plan your approach accordingly. The exact placements can shift with patches and map updates, so current in-game information should be treated as the most reliable source.
How long does the response to a mark last?
The exact timing is tuned patch to patch, and the pre-release coverage does not commit to a single number. The general pattern is that the response is intense for a short window and then cools down as units return to their patrol routes. The practical implication is that waiting out the response is almost always a valid option, especially for solo players who are not on a tight extraction timer.
Should I prioritize the eyes in the sky or the ground units?
It depends on the situation. If you are in the open and exposed, breaking line of sight to the observer is usually the higher priority because it stops the response from growing. If you are already in a marked area and the response has arrived, dealing with the immediate ground threat is usually the higher priority because the observer’s mark has already done its job. Reading the moment correctly is part of the skill curve.
Will the eyes in the sky change after launch?
It is reasonable to expect ongoing balance changes because Arc Raiders is being tuned throughout its early lifecycle, and the observer is a high-leverage unit. The role it plays in the ecosystem is unlikely to change, but specific numbers like detection range, sensor brightness, and response timing are candidates for adjustment. Players who treat their knowledge of the unit as a moving target will adapt more easily than players who memorize a single fixed behavior.
Arc Raiders asks players to read a world that is actively trying to read them back, and the eyes in the sky is the cleanest example of that exchange. Treat it as a known variable, plan around it before the match starts, and react to its cues in the moment, and the unit stops being a mystery and becomes a tool you can use. The same habit, applied across the rest of the ARC ecosystem, is what separates a player who feels outplayed from a player who is doing the outplaying.
Leave a Reply