Adamantine Forge BG3: what the quest actually is and why it matters
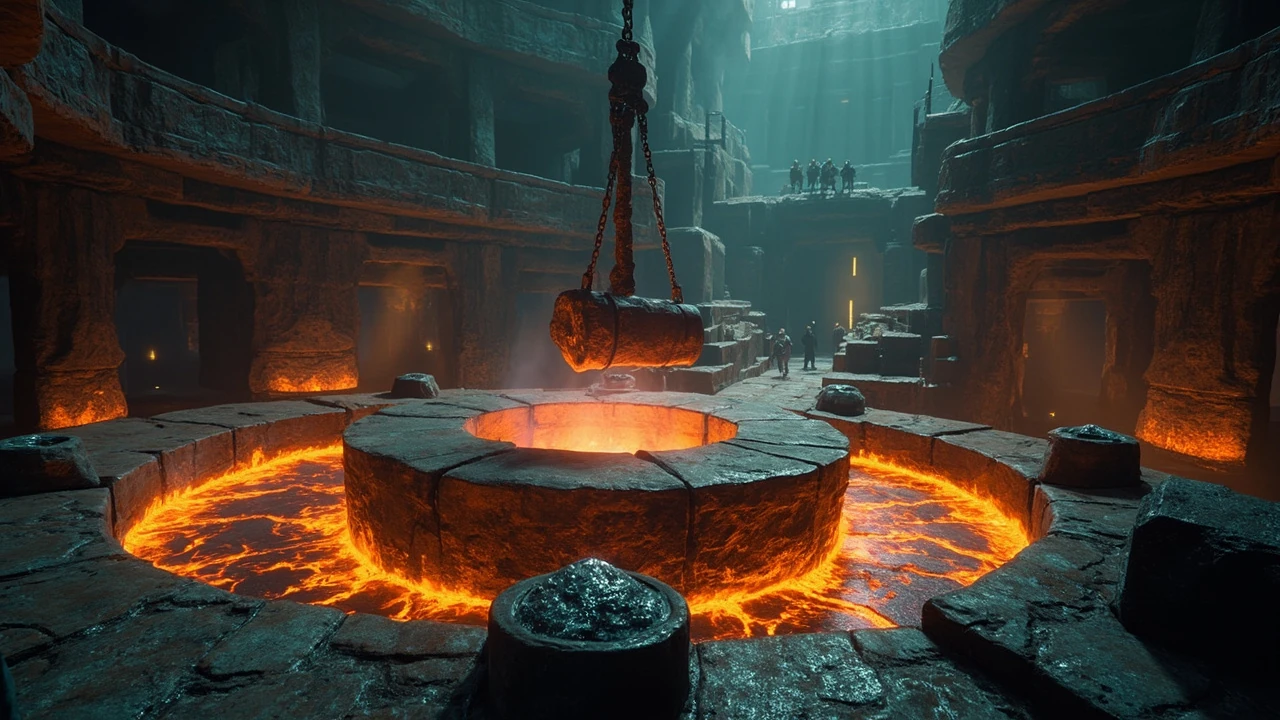
The adamantine forge bg3 quest is a long Underdark side story that rewards a party with some of the strongest mid-game equipment available in Baldur’s Gate 3, provided the party is willing to do the legwork. The forge itself sits in a chamber beneath the duergar outpost of Grymforge, and the only way to reach it is to follow clues left behind by three dead drow scattered across the Underdark, then survive a punishing boss fight against a construct called Grym.
For a GameDev-minded reader, the quest is also a useful case study. It is a self-contained slice of the game that combines exploration, dialogue, item puzzles, environmental traversal, and a multi-phase boss encounter, all gated behind an optional narrative thread. Understanding how the pieces fit together helps when planning a similar quest for your own project, and helps a player decide whether the reward is worth the detour during a current run.
Quest prerequisites and where to start the adamantine forge bg3 quest
The quest only becomes available once the party reaches the Underdark. The most reliable entry point is through the Shattered Sanctum, which places the party in the western Underdark near the Myconid Colony. The eastern Underdark entrance from the Mountain Pass also works, but several of the easiest clues are clustered near the western Myconid camp.
Before chasing the quest, the party should:
- Reach at least level 4, with level 5 strongly recommended for the Grym fight.
- Bring at least one character with a high Jump score, ideally 17 or more, because several traversal sections depend on long jumps onto small metal platforms.
- Stock up on healing potions, scroll-based revives, and at least one source of bludgeoning damage for the boss fight.
- Resolve or intentionally fail the “Free True Soul Nere” quest, since both Nere and the forge sit in the same Grymforge area and one path tends to block the other for safety reasons.
Two short side encounters also feed into the quest. The first is the Duergar Intruders at the Myconid Colony, which can be resolved peacefully or with violence. The second is the discovery of the Sussur Tree, which sits between the colony and the eastern Underdark and is relevant because one of the three drow is camped nearby.
How to find the three drow and unlock the Mourning Frost
The first act of the adamantine forge bg3 quest is essentially an information hunt. Three drow each carried a piece of knowledge about how the forge works, and that information is now scattered across the Underdark in their bodies, their notes, and their memories.
The Pale Corpse near the Myconid Colony
Inside the Myconid Colony, a merchant named Derryth Bonecloak stands beside a blue wall made of brambles. The wall is an illusion. Attacking it reveals a hidden chamber with a corpse. Looting the corpse yields a book that appears to be about “Lumph Mating Rituals” but is actually an illusion concealing the true topic: the adamantine forge. The same clue is also available by using Speak with the Dead on the Pale Corpse and asking what brought it to the Underdark.
This entry point is the most discoverable of the three, and it is also reachable through the Duergar Intruders quest, so the order of clues is flexible.
Filro the Forgotten near the Sussur Tree
West of the Sussur Tree, on a cliff, sits the camp of Filro the Forgotten. He is the second drow, and he has gone insane. Combat is the most reliable way to interact with him, since dialogue checks are unreliable on a hostile target. Looting his body produces a memory crystal and notes that hint at the forge guardian’s weakness. Speak with the Dead is an option if the party prefers a non-lethal approach, but it is gated by having a corpse to speak to.
Filro’s camp is guarded by Hook Horrors, which can knock characters off the narrow Sussur Tree roots or the surrounding cliffs with a single blow. Spread the party out, use ranged attacks, and consider pulling the Hook Horrors one at a time rather than engaging the whole camp at once.
Dhourn and the Spectator near the Selune temple
The third drow, Dhourn, is in the southeast section of the Underdark, just west of the temple to Selune. A Spectator guards his hiding spot. Exiting through the broken window on the west side of the temple leads to a cavern of petrified statues where the Spectator spawns.
The Spectator has a routine that matters for the fight. Each round, it de-petrifies one of the statues and adds a charmed drow to the fight. The charmed drow are hostile until damaged; once damaged, the charm breaks and the drow become neutral allies. This means the party can end the fight with several temporary allies on the field if they choose their targets carefully. Dhourn himself may turn hostile during the encounter, but his body carries the third memory crystal and notes.
Combining the three clues into the Mourning Frost quarterstaff
Once all three drow have been dealt with, the party has three spear fragments: the Icy Crystal, the Icy Helve, and the Icy Metal. Combining them in the inventory creates the Mourning Frost, a magical quarterstaff that boosts cold damage. The staff is particularly valuable for spellcasters with cold spells in their kit, since it adds cold riders to cantrips and lowers saving throws against cold effects from leveled spells.
The Mourning Frost is a useful side reward, but the main reason to chase all three drow is to learn the location of the forge itself. Without the third clue, the party can stumble onto Grymforge, but the path to the forge chamber is much harder to read.
Reaching Grymforge and the forge chamber
With the three clues in hand, the next step is to cross the underground lake to Grymforge. The lake sits at the southwest corner of the Underdark, and the only safe crossing is the duergar ship docked near Gekh Coal. If the party has already found Thulla’s boots, Gekh will allow them to take the boat. If not, the boat can usually be taken by force or by pickpocketing the key, but both options can lock the party out of other dialogue paths.
Once at Grymforge, the party can choose between freeing True Soul Nere and pushing deeper toward the forge. The two paths share a long staircase, and the most reliable plan is to commit to one path, clear it, then return. Mixing the two tends to leave the party low on resources and short on safe resting points.
Getting to the adamantine forge: the platform puzzle
The path to the forge is a short traversal puzzle that doubles as a soft gear check. It is best solved by splitting the party.
- Head south from the central Grymforge area, past the trapped True Soul Nere, until reaching a dilapidated stone column with Brithvar standing beside it.
- Jump across the small gap onto the column, then continue south up a staircase to a pair of levers.
- Split the party. Send a single character with the highest Jump score north, then west, onto the black metal catwalk platforms.
- Walk that character to the far end of the catwalk, where a small metal platform is suspended from the ceiling.
- Use the levers to swing the suspended platform across the room and jump onto it.
- Drop down to the clearing with the teleport sigil, then activate the sigil and teleport the rest of the party over.
- Defeat the enemies in the southern chamber, destroy the chunk of Mithral ore with weapons or magic, and collect the ore.
The Mithral ore is the key ingredient for the forge. The chunk can also be harvested later from other veins, so missing a clean break here is not catastrophic, but the rest of the quest assumes the party has at least one ore in the inventory.
How the adamantine forge crafting loop works
The forge itself is a three-step crafting station. Each use requires a mould, Mithral ore, and a working lava channel that primes the boss encounter.
| Step | Action | Why it matters |
|---|---|---|
| 1. Insert mould | Place the chosen armour or weapon mould into the forge slot | Determines the type and tier of the resulting item |
| 2. Add ore | Place one chunk of Mithral into the crucible | Consumes the ore on a successful craft |
| 3. Activate | Pull the forge lever, lower the platform, open the lava valve | Triggers the Grym fight the first time and primes the forge |
| 4. Retrieve | Collect the finished item from the output grate | One item per use, no partial refunds |
Moulds are scattered around Grymforge, and they are easy to miss on a first pass. The most common picks for a balanced party are the scale mail mould for a medium-armour wearer, the shield mould for a tank or support character, and one of the weapon moulds for the main damage dealer. The party should pick up every mould they find and decide later which one to commit first, because each craft consumes the mould and the ore.
How to beat the Grym fight
Grym is the forge guardian, and it is one of the harder mandatory duels in the Underdark. The arena is the central platform above the lava pool, with catwalks around the rim and a forge lever on each side. The fight has a built-in win condition tied to the environment, and a party that ignores it is in for a long, grinding fight.
Mechanics that drive the fight
Grym has a very large health pool and high resistance to most damage types. The two main things that change the math are status and positioning.
- Superheated: When Grym emerges from the grate, it carries the Superheated status. This lowers its resistance to certain damage types and makes it especially vulnerable to bludgeoning damage.
- Aggression focus: Grym fixes its attention on the most recent attacker. This can be exploited by tanking it on a single high-mobility character while the rest of the party stays clear of its line of sight.
- Bludgeoning immunity: Without Superheated, Grym is essentially immune to bludgeoning damage. The forge hammer only deals its huge damage while the status is active, and the impact of the hammer removes Superheated.
The forge hammer combo that ends the fight
The intended win condition uses the forge hammer as a giant environmental attack. The setup is reliable once the party understands the rhythm.
- Position one character on the central crucible platform before the fight, and a second character on the forge lever opposite the grate.
- On round 1, attack Grym with any character. It spends its first turn awakening and does not move.
- Have the crucible character attack Grym, then jump to a platform on the opposite side of the forge from the grate. The rest of the party should pass their turn or use abilities that do not damage Grym, like Mage Armor or Invoke Duplicity, to keep Grym focused on the crucible character.
- On Grym’s next turn, it moves onto the central platform to chase the last attacker. Pull the forge lever to drop the hammer, knocking Grym prone and dealing very high damage.
- Continue the cycle. Each time Grym re-emerges from the lava, repeat the same positioning and hammer combo until it dies.
The hammer can be used at most once before Grym needs to be re-heated, and the impact removes the Superheated status. A common mistake is to spam the lever while the boss is still standing; the lever only works when the platform is properly raised and lowered, and missing the timing leaves the party exposed on the platform.
Failure modes and how to recover
The Grym fight punishes clustered parties, because the boss has area-of-effect attacks that scale with the number of targets in range. The most common failure modes are:
- Standing on the platform together. The lava pool and the hammer swings both hit multiple party members at once. Spread out and only stand on the central crucible when the combo demands it.
- Forgetting to re-heat. If Grym escapes the platform and cools down, the bludgeoning immunity returns. The valve by the large grate re-fills the forge with lava, which re-applies Superheated when Grym emerges again.
- Focusing damage dealers on Grym instead of the lever. A party member on the lever is the actual damage source. Treat the lever character as the most important role for the duration of the fight.
If the party wipes, the Grym encounter is repeatable. The forge does not consume any of its resources on a failed attempt, and the party can re-enter the chamber after a rest to try the combo again.
Best craft choices for a typical party
After the fight, the lever is used to create the first item. Each subsequent craft uses the same lever and a new mould. The choice of first craft depends on the party composition, since each mould produces a single, non-refundable item.
| Mould | Resulting item | Best fit for |
|---|---|---|
| Scale mail | Adamantine Scale Mail | Medium-armour fighters, paladins, rangers who rely on mobility and crit reduction |
| Shield | Adamantine Shield | Tanks and front-line supports who need high AC and a reliable reaction bonus |
| Longsword | Adamantine Longsword | Main melee damage dealers using two-handed fighting or a shield-and-sword setup |
| Scimitar | Adamantine Scimitar | Dexterity builds, rogues, and gishes that want to combine crit reduction with fast attacks |
| Greataxe | Adamantine Greataxe | Berserker-style barbarians who want the strongest possible single-target swing |
Adamantine items share a key passive: they critically hit on a roll of 19 or 20 instead of only on a natural 20, which translates to roughly a 10 percent boost in effective crit chance on every attack. They also tend to have higher base damage or higher AC than their standard counterparts. For a party that is uncertain about the first craft, the scale mail and the shield are usually the safest picks because they plug into almost any front-line build without requiring specific weapon proficiency.
How the quest fits into the wider Underdark route
The adamantine forge bg3 quest does not have to be the party’s first priority in the Underdark. It runs in parallel with the Duergar Intruders and Free True Soul Nere, and the order in which those three resolve changes the difficulty curve more than the order in which the three drow are found.
- Forge first, then Nere. This is the safest order for an under-leveled party, since the forge encounter is self-contained and Nere’s forces are weaker once they lose the duergar leadership.
- Nere first, then forge. This is the natural narrative order, but it commits the party to a long fight before the forge, which can leave the Grym encounter under-resourced.
- Forge last, with both other quests already done. This works, but the path through Grymforge is more cluttered with enemies by the time the party reaches it, and the lever may already be in an unexpected state depending on earlier choices.
For most parties, going straight for the forge after collecting the third drow and then circling back for Nere is the most reliable path. It also keeps the option open to simply leave Nere trapped, which is a valid choice for a party that prefers the forge rewards to the Nere rewards.
Common pitfalls and how to avoid them
Most failures during the adamantine forge bg3 quest are not the Grym fight itself. They happen during setup. The following pitfalls are the most common and the easiest to fix.
- Missing a mould. Moulds blend in with the environment in Grymforge, and a fast-moving party can easily clear the area without picking them up. A slow pass through each chamber with a loot filter active catches them.
- Using the wrong weapon against Grym. Slashing and piercing damage work, but the lever combo is the real damage source. A party that does not understand this tends to drag the fight out and run out of resources.
- Skipping the rest before the fight. The Grym arena is a dead end. There is no safe resting point inside, and the party is expected to enter at full resources. Saving the long rest until just before pulling the lever avoids a wipe that sends the party back to camp with no progress.
- Pulling the lever twice without re-heating. The hammer is a one-shot per Superheated window. Pulling it again on the same cycle deals no damage and exposes the lever operator to a counter-attack.
Frequently asked questions
Do I have to do the adamantine forge bg3 quest in Act 1?
The forge is technically available the moment the party reaches Grymforge, which usually happens in Act 1. The quest does not time out, but the difficulty is balanced for a level 4 to level 5 party. Returning later in the campaign is possible, but the rewards are tuned for mid-game builds, and the most valuable Adamantine items tend to get outclassed by late Act 2 and Act 3 gear if the party waits too long.
Can I skip the three drow and still find the forge?
Yes, the path to the forge is reachable without the clues, but the platform puzzle is harder to solve without knowing what to do. The clues also gate the Mourning Frost, which is the main reason to chase all three in the first place. Skipping the drow is viable for a party that does not need the staff and is willing to brute-force the platform section.
What happens if I let Derryth Bonecloak die?
Derryth sells useful mid-game consumables, but her death does not block the quest. The hidden chamber behind her bramble wall remains accessible, and the Pale Corpse can still be looted or spoken to. The main cost is losing a merchant and a possible quest reward elsewhere in the Underdark.
Is the Mourning Frost worth crafting?
For a cold-focused spellcaster, the Mourning Frost is one of the strongest mid-game quarterstaves. The cold rider applies to multiple cantrips and the staff is compatible with most caster classes. For a party that does not rely on cold damage, the staff is still a respectable weapon but not a build-defining pickup.
Can I beat Grym without the hammer combo?
Yes, but the fight becomes much longer. A party can clear the encounter with sustained damage, healing, and crowd control, especially at level 5 or higher. The hammer combo is the intended shortcut, not the only valid approach. A pure-damage strategy works best when the party has at least one dedicated healer and a reliable source of cold or force damage.
Do I lose the forge if I resolve the Nere quest first?
No, the forge remains accessible regardless of the Nere outcome. The two quests share the same area, and the only meaningful difference is which enemies are on the path. Clearing Nere first usually means a slightly easier path to the forge chamber but a more difficult Grym fight, because the party is already low on resources.
How many Adamantine items can I craft per run?
Each forge use consumes one chunk of Mithral ore. Multiple Mithral veins exist in the Underdark and around Grymforge, so the practical limit is how many veins the party is willing to clear. There is no daily reset and no per-rest cooldown, so a thorough party can craft several items in a single visit.
What is the best Adamantine item for a new party?
The Adamantine Shield and the Adamantine Scale Mail are the two safest picks for a party that has not specialized. Both raise survivability across multiple builds and do not lock the party into a specific fighting style. The Adamantine Longsword is a strong alternative for a party that already has a frontline tank and wants to push damage.
Is the boss fight harder on higher difficulty modes?
Yes. Grym’s resistances and damage scale with the difficulty setting, and the Superheated vulnerability is narrower on higher modes. The hammer combo still works, but the party has less margin for error and the second cycle of the combo becomes more punishing. A pre-fight long rest and a dedicated lever operator are even more important on the higher difficulties.
Can I come back to the forge after leaving the Underdark?
Yes, the forge chamber remains accessible through the rest of Act 1 and most of Act 2, as long as the party can return to the Underdark. The Grym encounter does not respawn after the first kill, so subsequent visits are pure crafting sessions. This makes the forge one of the most efficient endgame crafting stations in the early-to-mid game.

Leave a Reply